Installation Guide for our Bathroom Niches
Thank you for choosing a ZVELT bathroom wall niche. Carefully follow the installation steps below to fully enjoy your new purchase for the models: Ana 36 x 8 / Alba 12 x 48 / Acia 24 x 12 / Andy12 x 24 / Ally12 x 12
Tools needed to install our bathroom niches:
- Silicone adhesive
- Chisel
- Drywall saw
- Pencil
- Tape measure
- Level
- Double-sided tape (included)
- Masking tape
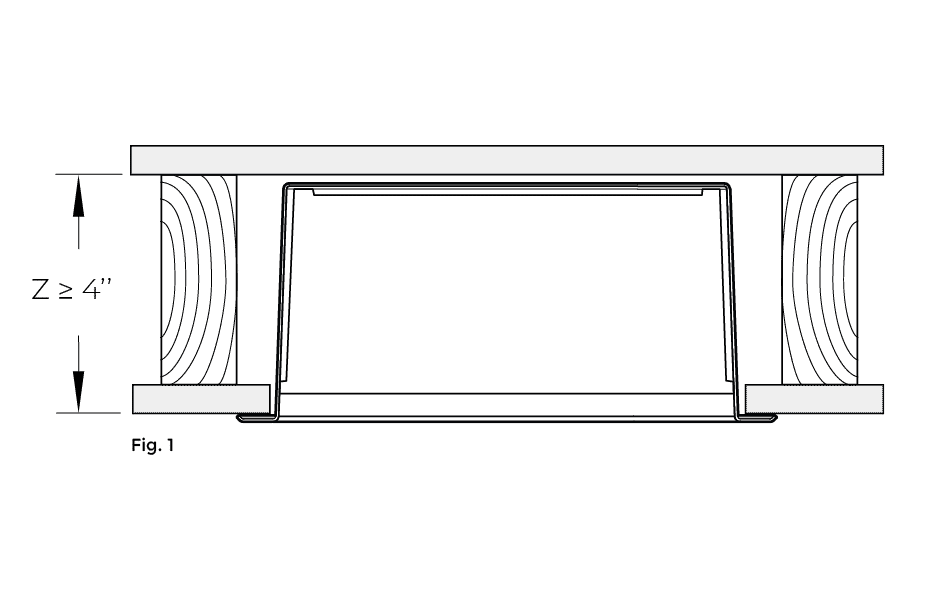
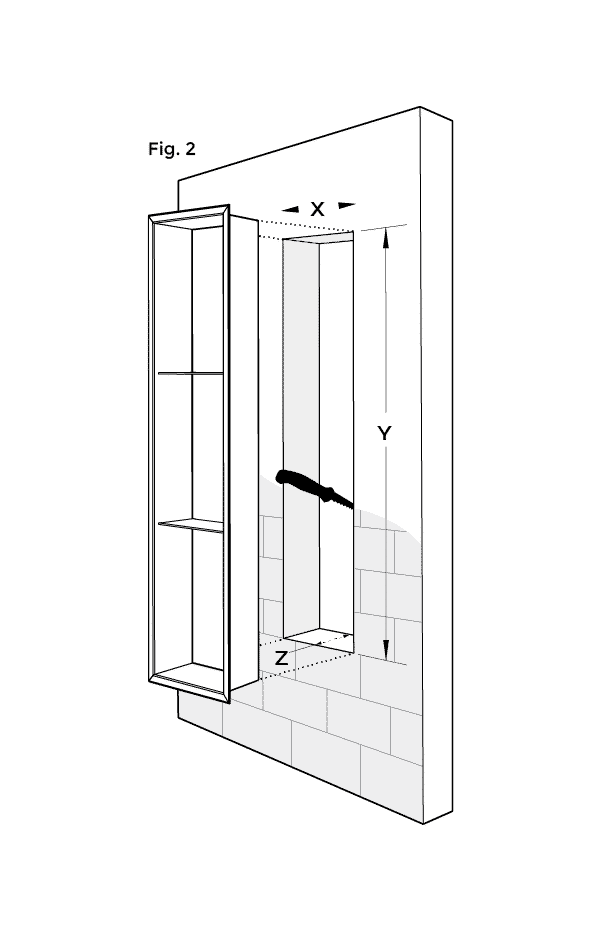
Important : The bathroom niche requires a minimum 4-inch deep partition to be installed. (Fig.1-2)
Step 1
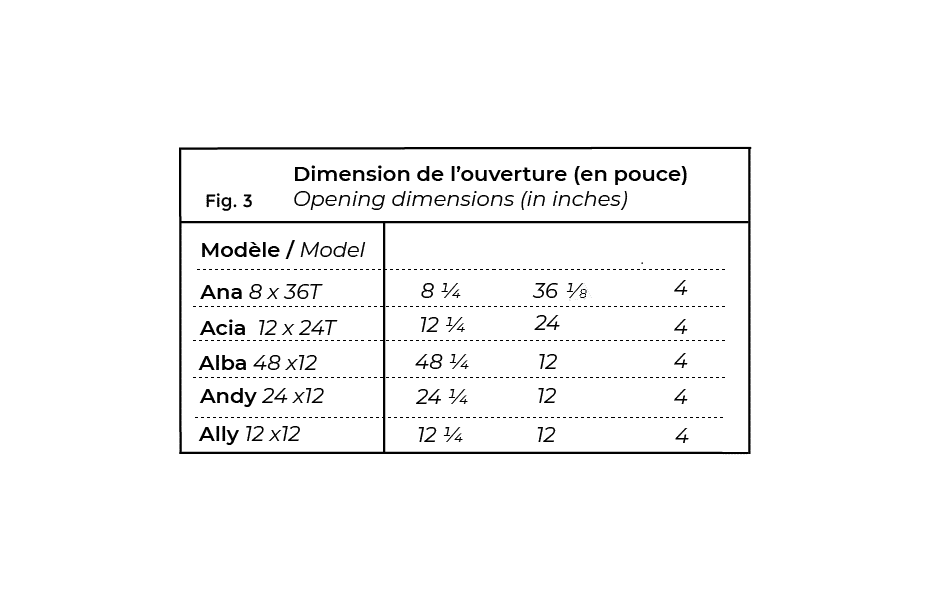
Trace the opening to be cut out, referring to the table below. (Fig. 3) Ensure the tracing is square. Cut out the section of wall to be removed using a drywall knife or a grinder in the case of ceramic tile covering.
Step 2 (optional)
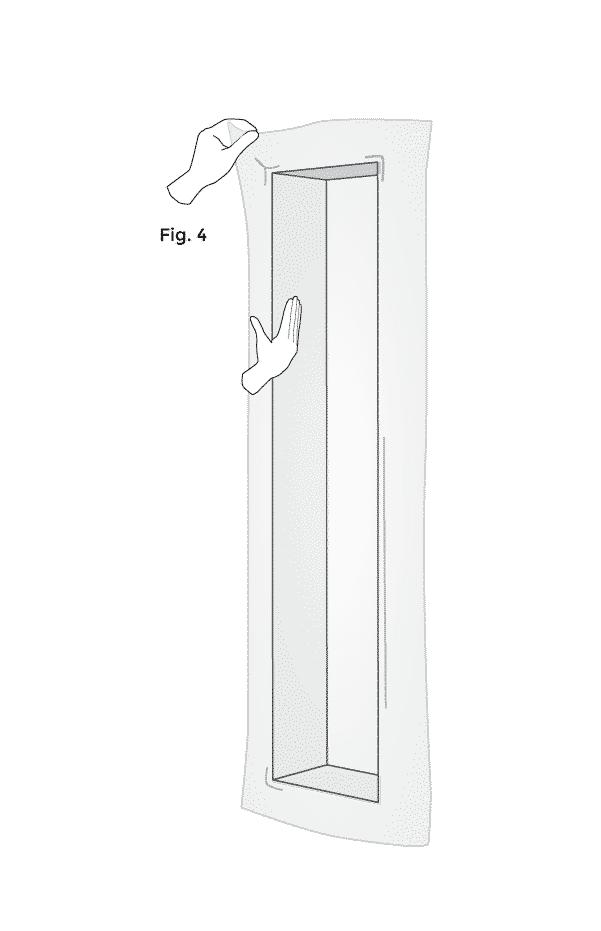
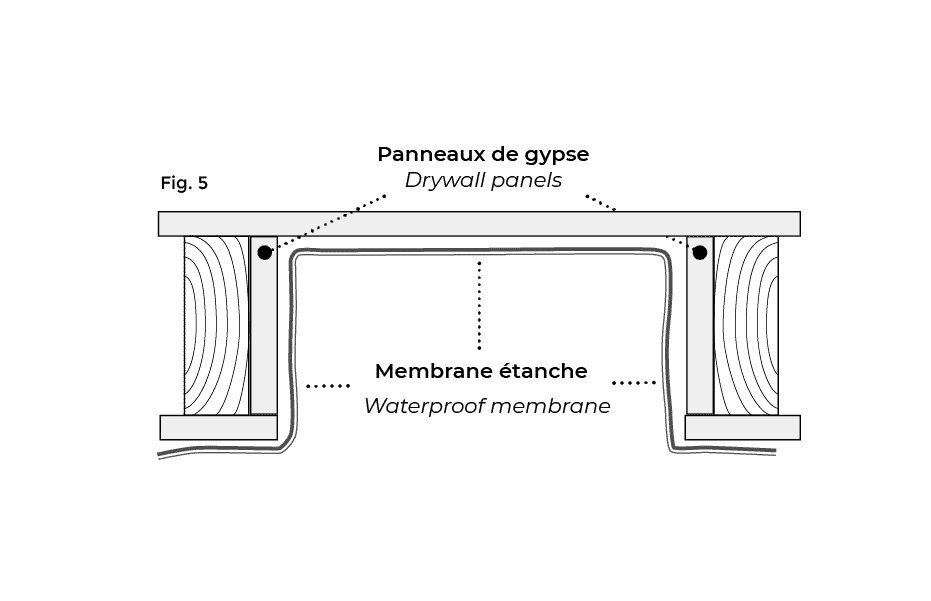
To ensure optimal waterproofing, it is recommended to install gypsum panels on the walls of the opening (while respecting the suggested dimensions) in order to stick a waterproofing membrane to it. (Fig.4-5)
Step 3
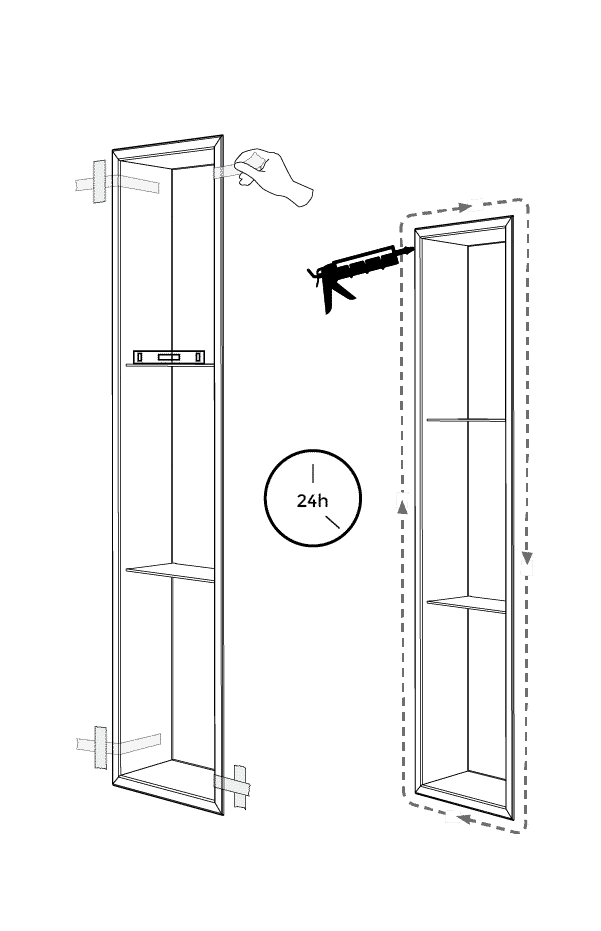
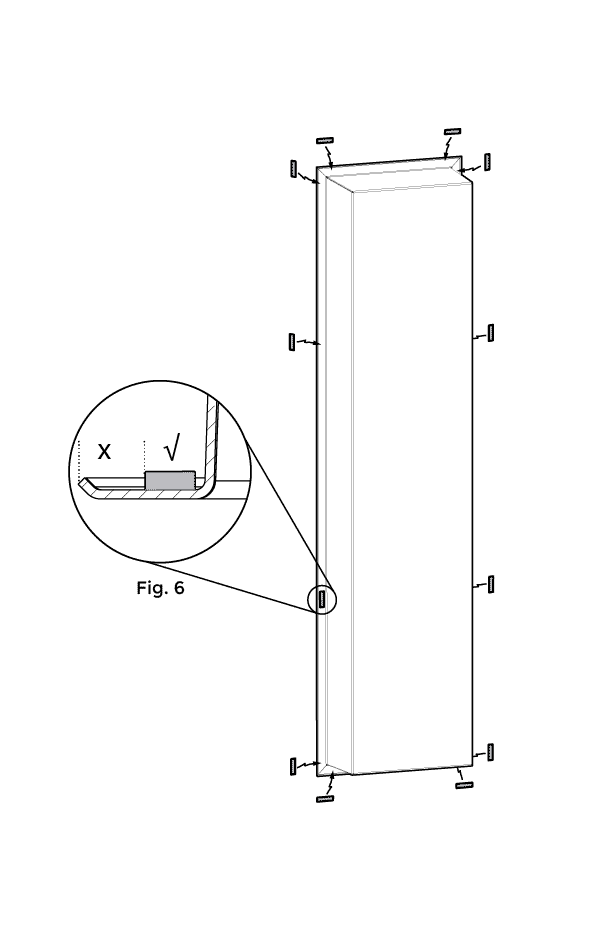
Using the provided double-sided tape, cut strips approximately two inches (2") long. Apply the pieces to the locations indicated on the drawing, making sure to position them toward the inside of the wall niche. (Fig. 6)
Tip: Before moving on to the next step, test fit the wall niche in the opening to ensure the dimensions.
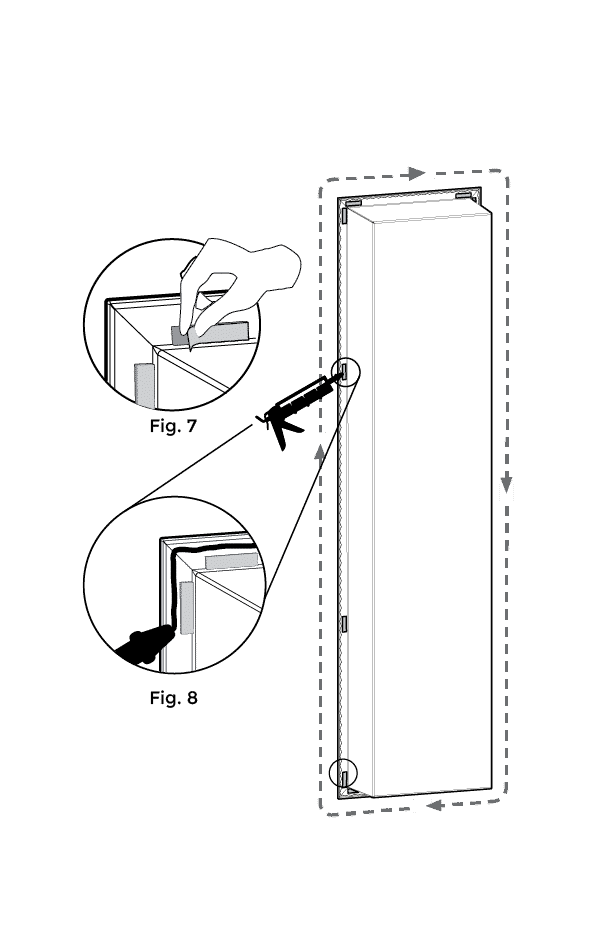
Step 4
Remove the remaining film from the double-sided tape (Fig.7). Apply silicone adhesive all around the wall niche in the indicated location (Fig.8)
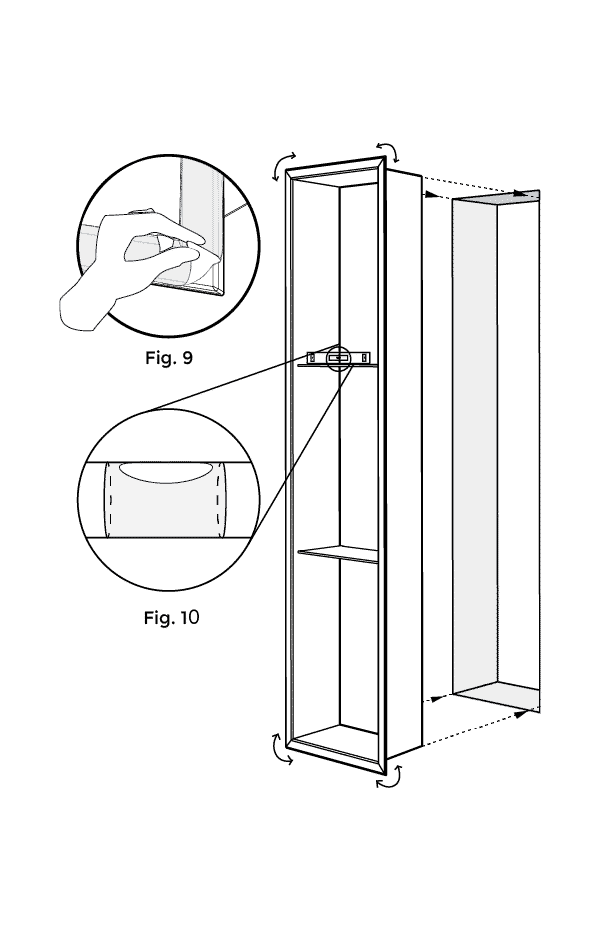
Step 5
Remove the protective film (Fig.9) Gently insert the alcove into the opening, ensuring it is level and apply adequate pressure to adhere the double-sided tape and silicone. (Fig.10)
Tip: Remove excess silicone once it is dry.
Step 6
Use masking tape to hold the alcove to the wall while it dries (Fig. 11). Remove the masking tape and seal the edge of the alcove with silicone (Fig. 12).